Wednesday, April 2, 2014

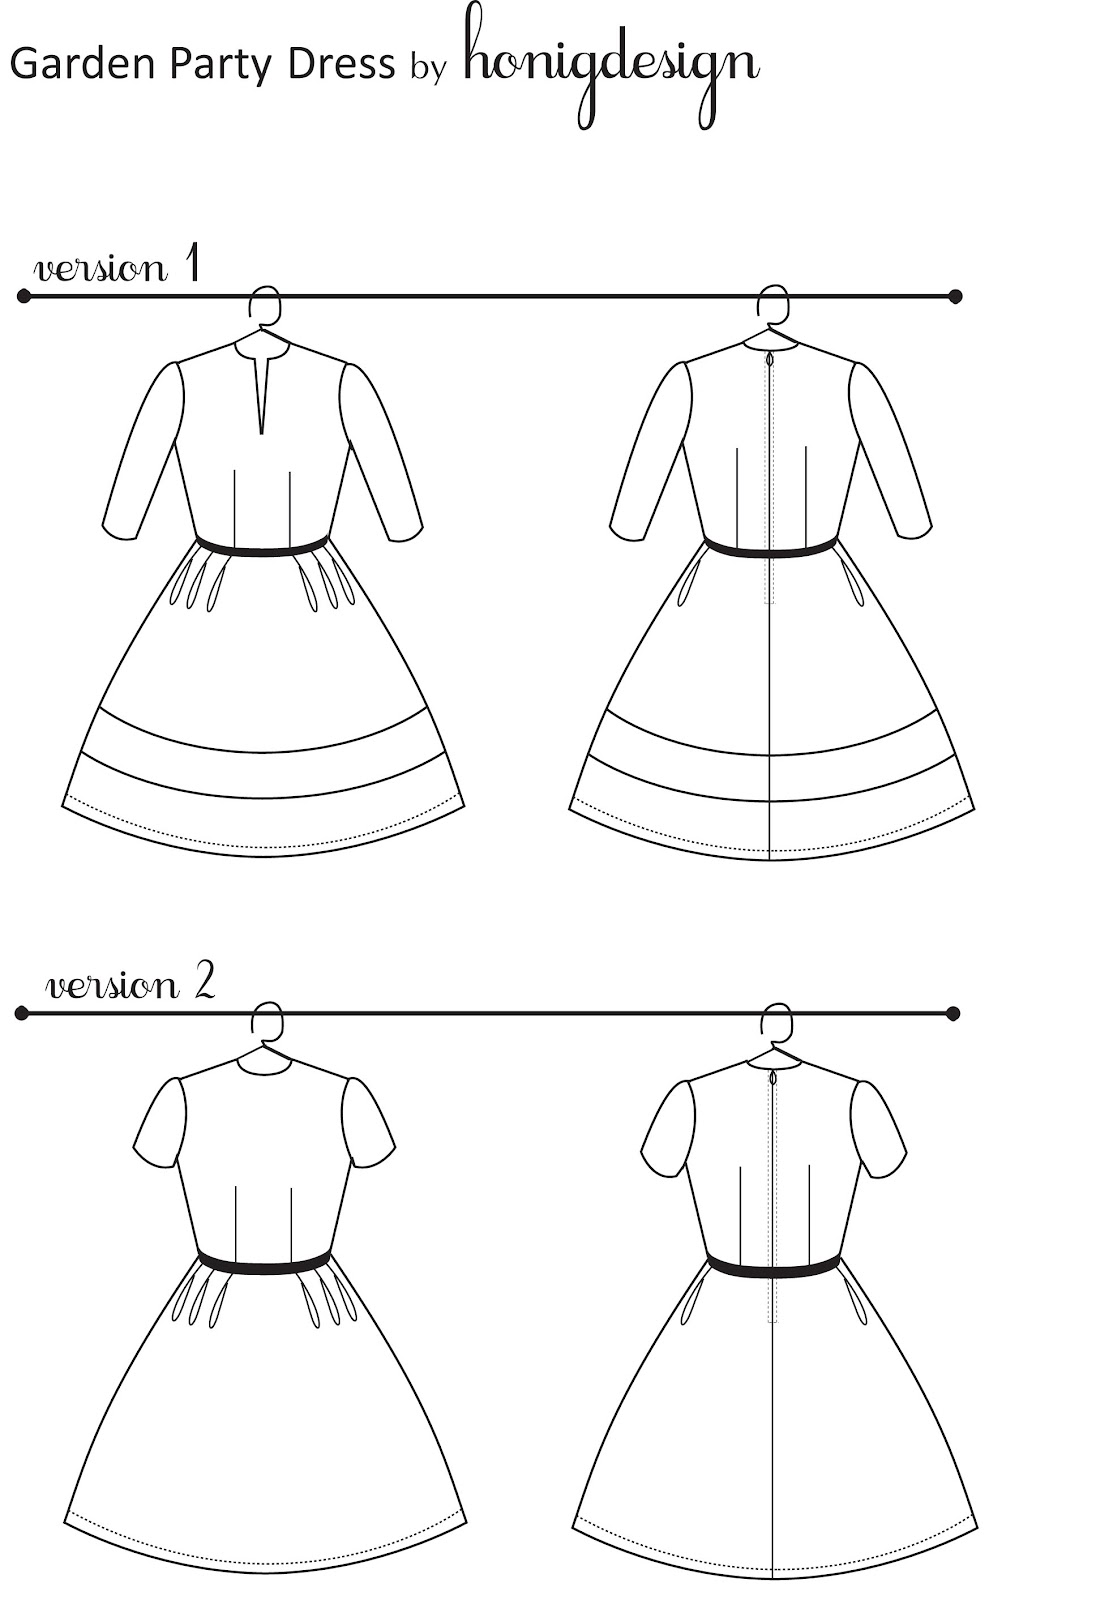
Garden Party Dress Pattern


Well, hello everyone!
Fancy a sewing project  this week-end?  How about your very own Garden Party Dress?!   I'm so excited to finally be able to post this pattern!  (Remember versions, 1, 2 and 3?) It's been a super fun project, the only glitch - my printer breaking down at the last minute - but what's life without a little drama?  I hope you all like it as much as I do.
Download the pattern here, and the instructions here

UPDATE:  You can now download a version of this pattern with wider sleeves by clicking here.  I received some feedback that the original sleeves were slightly narrow, so if you would like to work with a larger sleeve please use this version.   In both cases, please see my tutorial on how to customise the sleeves to fit your arms.

Please print on A4 paper and check that your printer is on 100% scale (not scale to fit)

Before you cut your fabric, please read these two tutorials:
  1. Customising the sleeves.  The GPD has a very fitted bodice designed with little ease, especially in the sleeves.  You may find these too narrow - it's a good idea to measure the sleeves and adjust them before you cut.
  2. Moving the skirt band.  This tutorial shows you how to adjust the location of the skirt band, especially important if you plan to use lace!

Why I love wearing it:
  • It's a simple and modern dress, but with a bit of vintage about the silhouette.
  • It's an all-in-one outfit.  No cardigan or shawl needed.
  • It's versatile and multi season. You can wear it with heels, boots or sandals for a complete look, either casual or dressy.   Sew in a warm wool for cooler days or lightweight cotton with short sleeves for summer.
  • It has SIX style options, on the skirt, bodice and sleeves. 
That's why I love it, but why not see for yourself?  I'd be endlessly grateful, if you do sew it, if you could send me a little feedback to designhonig[at]gmail[dot]com.

Starting Monday, I'll walk you through how to tailor the sleeves to your own fit and how to change the location of the skirt band (version 2) and hem band. (As it's an a-line skirt, not a rectangle, you'll have to trace off the new band location and add seam allowances accordingly.)

I've also tried to make the .PDF experience as painless as possible!  Please refer to page 3 of the instructions for details on what you need to print.  

I really hope you enjoy making this and would love to see your versions if you do.

Until Monday, have fun and happy stitching!

Make Mommy Happy 30 Minute Dress

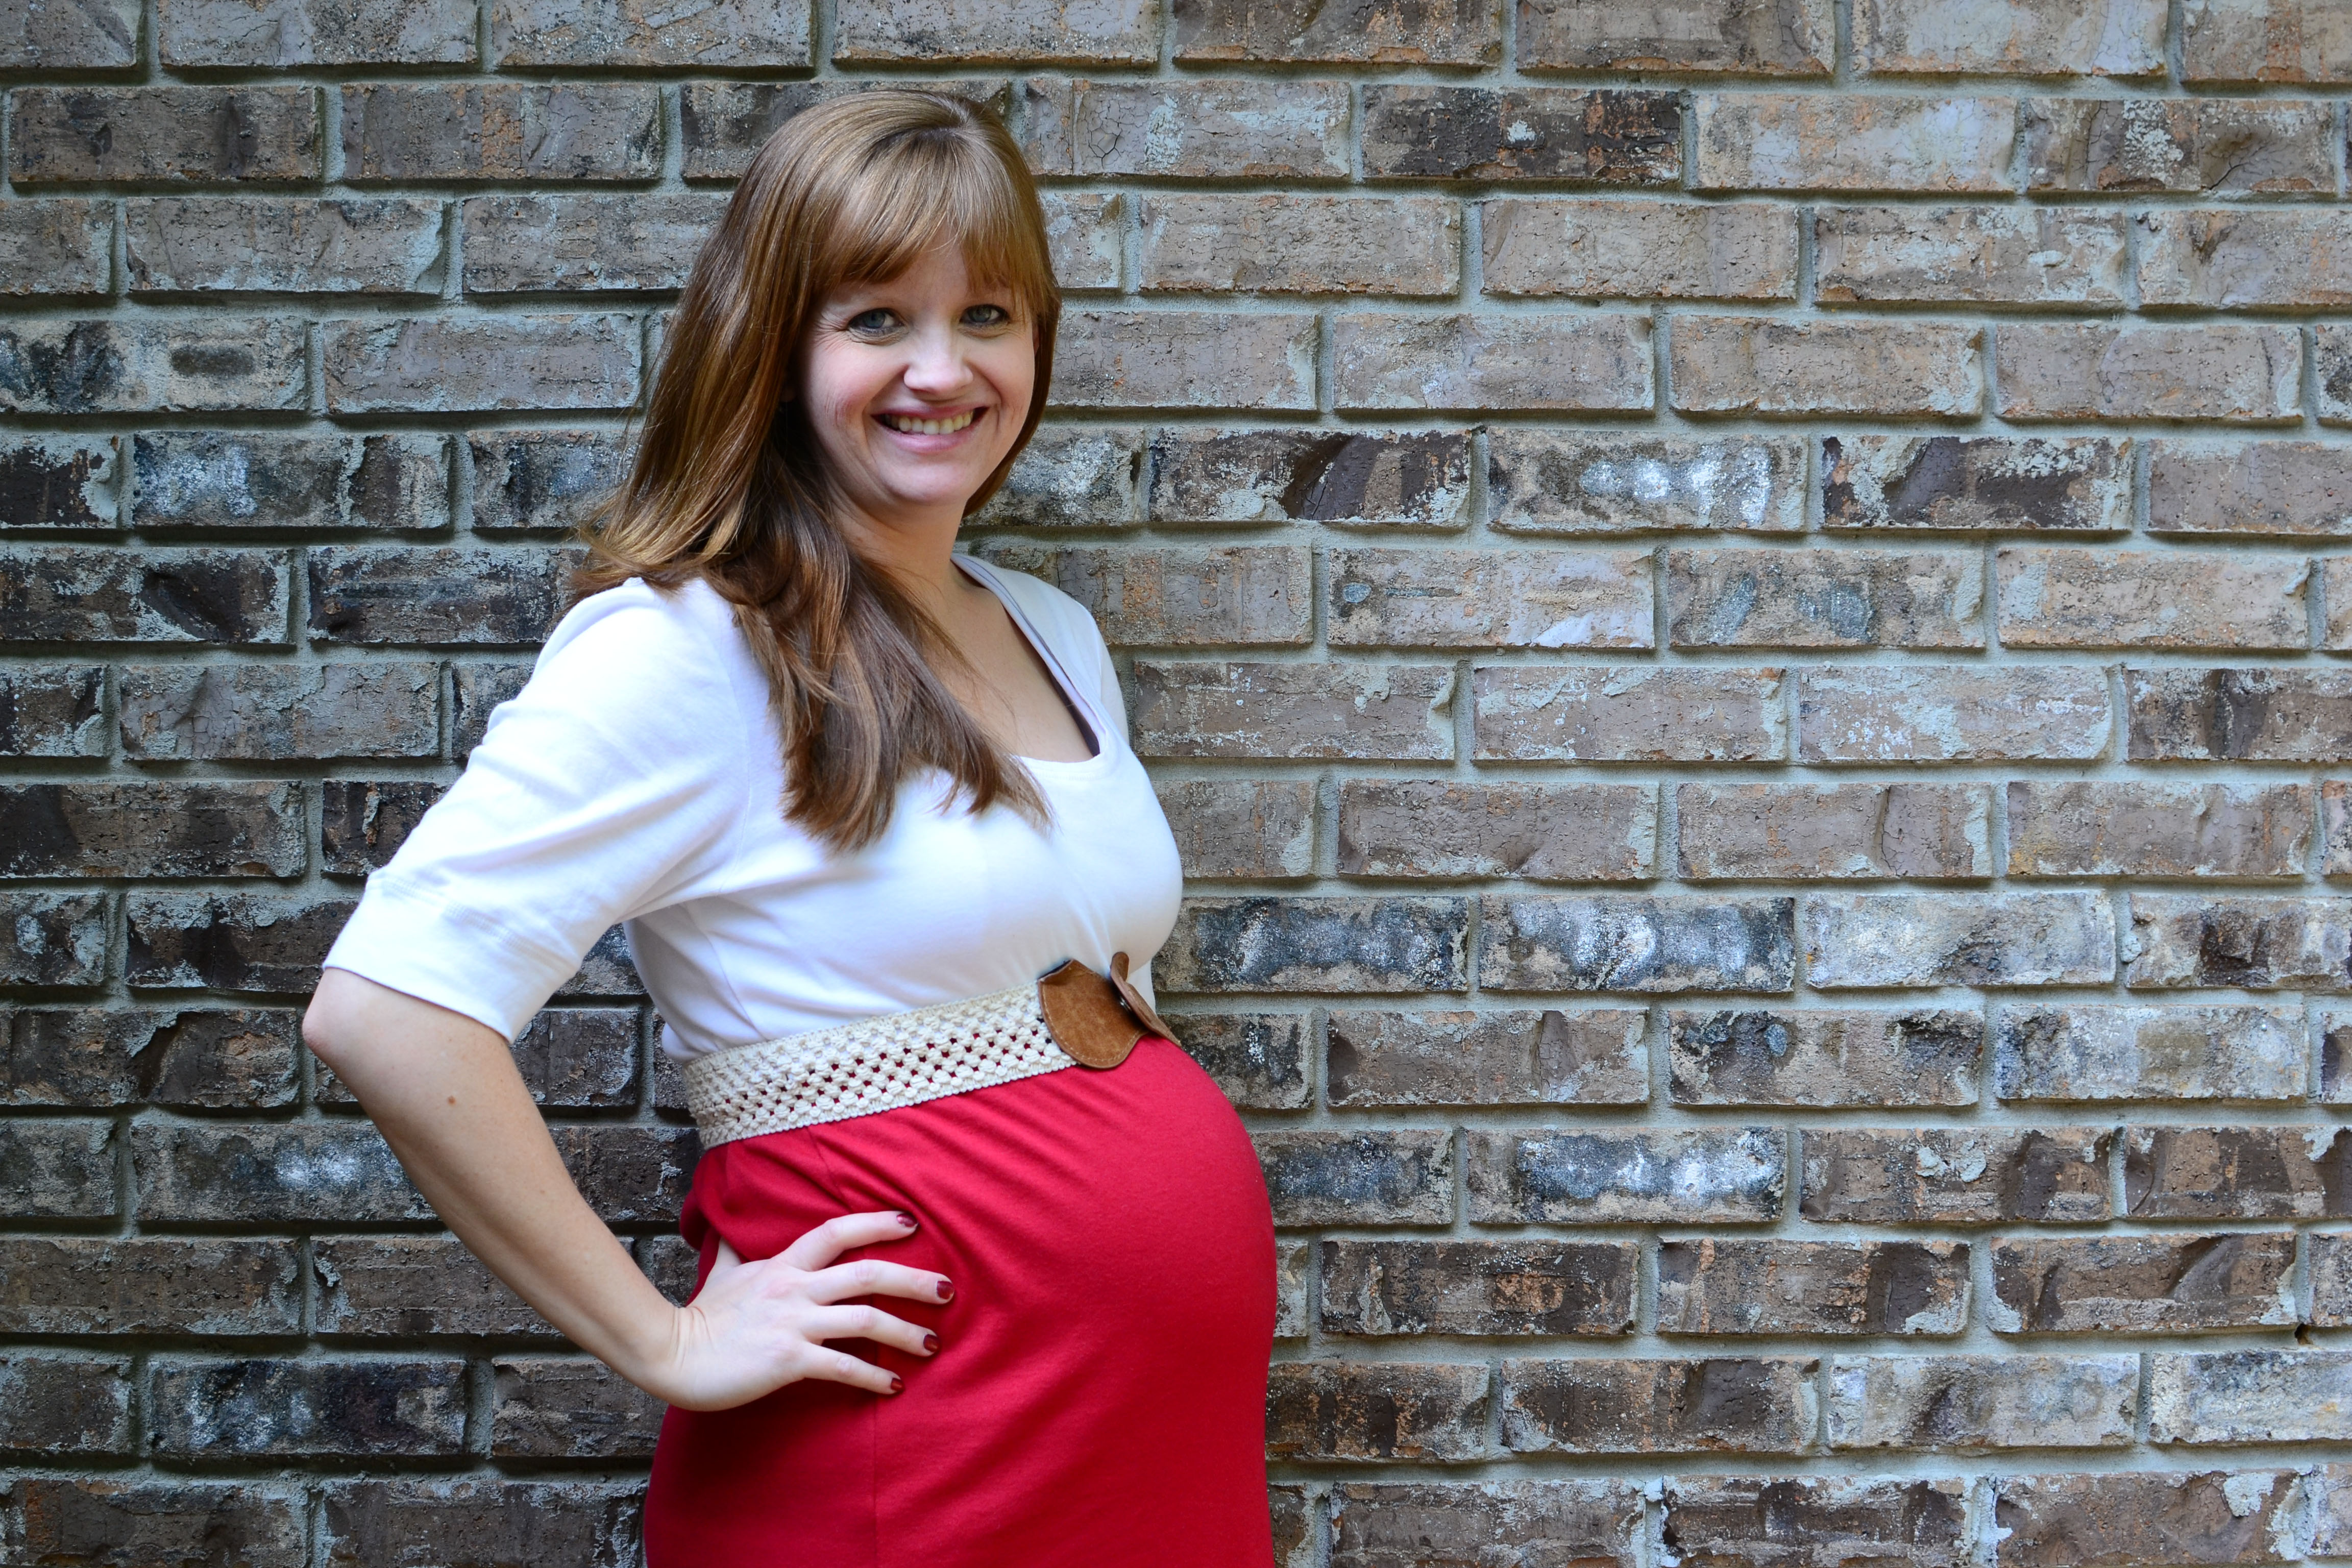
Ok, so have you ever been all psyched to go someplace, like thinking about it for weeks, all planned out what to wear down to the shoes and then…….you live in Alabama and it storms like when Noah built the ark the day before and the temp drops 20° and it is now going to be down right windy/cold on the big day and that outfit that makes you feel super pretty and oh so fashionable will now make you look like you don’t have a brain in your head because you don’t pay attention to the weather as you freeze from the lack of arm/leg coverage and on top of all this you are 7 months preggers and feel like a whale? Really….just me….odd. Anyway this was my dilemma on Friday night leading into Saturday. Nice way to start the weekend huh?!
So as I sat watching the storms roll in on Friday all I could think of is “Great now what am I going to wear tomorrow?” As you know from reading my earlier post I am a HUGE nay, COLOSSAL fan of Alabama Football and this Saturday was the spring football scrimmage game. Trust me people it is an event not to be missed and I had looked forward to it for weeks.
So come Saturday morning the weather was sooooo not cooperative and the cute little non-maternity big giant whale looking dress was not going to work at all. So what is a resourceful Mommy with a serger, an old t-shirt and some red knit to do….make a new dress!!! Woot Woot!!
So here it is the Make Mommy Happy 30 Minute Dress. I knew it had to be super simple because I literally had only an hour to whip something up, so I looked in my closet to see what I could cut into and in true Tim Gunn fashion “Make it work”.
I found this old, stretched out tee I had from my first pregnancy, note the 2007 at the bottom, so we know we won’t be wearing that again. It was ¾ sleeves so that would help with the coldness issue and was white which is one of Bama’s colors. Bonus this is a maternity shirt so it would accommodate the uhhh “girls”.
So I put it on and roughly marked where to cut it off, right below the bust line. So then I took my rotary cutter to it and BAM, I had the top half of a soon-to-be maxi dress.
This next part was the tricky part. I had a big cut of red knit, Bama’s other team color, so I knew I had enough to fit the bump but had never done a maternity anything before. I don’t like the look of most maternity dresses because they all seem to have WAY too much fabric in the front panel for me. My baby belly isn’t that big yet so I don’t need a tent of a dress. Plus I kinda like it to “fit’ and show off the pregger bump.
I knew I wanted it long, to again combat the cold, so I measured down from the edge of the cut t-shirt to ankle length (for me it was 40”), taking into account for seam allowance (ended up being ½”) and cut the fabric to that length.
Then came the fitting the bump part. I knew the easiest/quickest way would be to cut it on the fold rather than sewing 2 panels together. Being short on time I literally held the cut fabric around me, again taking into account for the seam, and pinned it down a couple of inches. I then slid it off and measured what I had pinned. For me it ended up at 41” and with the ½” seam I cut it to 41 ½”.
Remember the other end is the fold
Then I ran waddled to my trusty serger and got to work. I sewed up the skirt first. Simple enough, one seam up the side and it was done.
Then I took the cut off shirt and matched a side seam to the new skirt seam I had just made. The fates must have been smiling on me because the shirt and skirt ended up lining up perfectly, no gathering needed. (I told you the shirt was kind of stretched out). If I were to do this over, which I am totally going to, I would put some gathers in the front to add a bit of fun detail and again show off the bump, but this was about time and ease.
So once I had the shirt pinned to the new skirt, right sides together I went back to the serger and sewed it up into a full dress. As for the bottom hem I left it raw. That is the awesome thing about knit, you never have to finish a hem if you don’t want to.
That was it!! I was done. To dress it up a bit I put on a belt that went with another dress and voilĂ  a new maxi dress in 30 minutes (and a darn cute one if I do say so myself).  When I make this again I will likely do a “waistband” (how funny to think of having a waist this preggers) that ties around back.
It isn’t perfect and the seam joining the skirt to top got a little puckered as I wore it but under the belt no one could see. I actually got a couple of compliments on it and it made me feel cute and super proud of myself and at 7 months pregnant that is worth its weight in gold!

Onesie Dress {Tutorial}

My Sister-in-law is having a girl so I had the perfect chance to sew up a cute little dress!
Onesie Dress {Tutorial} - finddailyjoy.com
Since this onesie dress is fast and easy to construct it not only makes a perfect baby shower gift but it is also a great way to utilize those random onesies that don’t quite match anything else.  As an added bonus, the onesie is a built in diaper cover which eliminates the need to make matching bloomers.
Onesie Dress {Tutorial} - finddailyjoy.com
For this project you will need:
  • Onesie
  • Fabric for the skirt
  • Coordinating thread
  • Buttons, ribbon, or flower to embellish
Measure the width of your onesie and multiply the number by four to determine the width of the skirt fabric.
Onesie Dress {Tutorial} - finddailyjoy.com
Measure the finished length of the skirt (from where you want to sew the skirt at the waist to where you want the bottom of the skirt to be) and add 1 1/4″ to determine the length of the skirt fabric.
Onesie Dress {Tutorial} - finddailyjoy.com
Cut your skirt fabric based on your math.  For my 0-3 month onesie the width of the onesie was 8.5″ and the finished length of the skirt was 10″ so I cut my fabric 34″ x 11 1/4″.
Onesie Dress {Tutorial} - finddailyjoy.com
Along one of the widths of the skirt sew a small zig zag stitch near the edge of the fabric.  This seam will be exposed and the zig zag stitch will help keep the fabric from raveling.  Then along that same edge of fabric sew a basting stitch 1/4″ from the edge.  Be sure not to backstitch or tie off the ends of the threads from your basting stitch.
Onesie Dress {Tutorial} - finddailyjoy.com
Now fold the skirt in half with rights sides facing and stitch the two length sides together with a 1/2″ seam.  Then sew a small zig zag stitch near the edge of the fabric on this seam.  Be careful not to get the threads of your basting stitch tangled up, you still need to work with them. (Please ignore the fact that I had already hemmed the skirt in this picture.  I was doing this project late at night I wasn’t thinking straight! :) )
Onesie Dress {Tutorial} - finddailyjoy.com
To hem the bottom of the skirt, fold the fabric under 1/4″ and press.
Onesie Dress {Tutorial} - finddailyjoy.com
Then fold the hem under 1/2″ and press.
Onesie Dress {Tutorial} - finddailyjoy.com
Stitch along the hem close to the first fold.
Onesie Dress {Tutorial} - finddailyjoy.com
Now gently pull one of the threads from your basting stitch to gather up the top of your skirt.  Continue to gather the skirt until it is the width of your onesie.
Onesie Dress {Tutorial} - finddailyjoy.com
With a disappearing ink fabric pen draw a line across the front and back of the onesie indicating where you want the top of the skirt to be attached.  To help you make a straight line you may want to measure the same length down from under each sleeve.  As you can see, my attempt to eyeball the line the first time didn’t work out.
Onesie Dress {Tutorial} - finddailyjoy.com
With the onesie right side out and the skirt wrong side out, slide the skirt over the onesie with the bottom hem up towards the neckline.  Then pin the skirt in place along your line.
Onesie Dress {Tutorial} - finddailyjoy.com
Sew along the skirt 1/2″ from the edge.
Onesie Dress {Tutorial} - finddailyjoy.com
Pull the skirt down into place and press along the skirt seam.
Onesie Dress {Tutorial} - finddailyjoy.com
Now it is time to add some fun embellishments!  I rummaged through my spare buttons and sewed on a few that coordinated with my fabric.  You could add a pretty flower or use ribbon to make a bow or ruffles.  Feel free to go crazy and make your dress super cute.
Onesie Dress {Tutorial} - finddailyjoy.com
Now I just have to wait for the sweet little girl to arrive!

how to reduce black heads

A lot of people both boys and girls, men and women have struggled with blackheads at one point or the other in their life and we have to admit that they are not a pretty sight.
All that dirt, oil and sebum that collects and sticks to the pores and hardens, creates blackheads. For most people the blackheads are on the chin, forehead and nose. That's the 'T' zone, that is the oily zone for most people. If regular washing and simple exfoliating is not working, try this simple easy way to get rid of nasty blackheads. Follow these steps:
Directions:
1. First, you will have to remove the dead skin that is keeping the blackheads trapped in the pores. For that, you have to wash your face with an exfoliating face cleaner or face scrub and make circular motions putting pressure on the affected areas the most.
2. Steam your face... Put some water in a pot and bring it to a boil. Take it down and put your face over the steam and be careful not to spill the hot water on yourself. Steam for 10 minutes with a towel over your head to keep the steam in. This will help loosen the blackheads making them easier to remove.
3. Make a mix of 4 tbs of baking soda with 1 cup mineral water. Apply the paste on your face and leave it for 10 minutes. The backing soda will draw all the impurities and bacteria out. Rinse with warm water.
Very important!!!
1. Pay attention not to squeeze blackheads, because this can produce deeper, painful sores, and can sometimes turn into open pores.
2. Do not use your fingernails to pick at blackheads as bacteria from your nails can give u an infection.
3. After a steam and backing soda treatment pat your face down with ice cold rose water or the toner that's meant for your skin type.
4. Always use a good face pack to close the open pores.